Cozy sweatshirt dress

It’s been ages since I have posted anything on my blog. I have made of course many garments but have not been motivated to take pictures and post…..My co-worker was kind enough to take some pics at lunch so at the least these ones are not blurry.

IMG_4226

A sewist on Instagram posted a picture of an aubergine Renfrew top she made into a dress in organic French terry and I fell in love with it right away. I just had to have one. This was my first time sewing with French terry and it was fantastic to work with and serged like a dream. Cozy-comfortable factor is high!  Though sweatshirt dresses are usually not that flattering, I really could care less when I am wearing it because it just feels so nice.

IMG_4225

I’ve had the Sewaholic pattern for ages but shied away from using it out of sheer laziness. Because these patterns are drafted for B-cup pear shapes it required a lot of grading to fit my measurements. Grading is easy but it just seamed like a lot of work for a t-shirt. I started with size 6 shoulders and sleeves, then to a size 10 bust, to a size 6 waste, and size 2 hips. Size 2 hips! Ha! That’s funny. I used McCalls 6886 knit dress pattern from the hips down and added a cuff to the hem. The terry is sewn with the loop side in for the whole dress except for the cowl which is loop side out for a bit of textured contrast.  It’s a nice effect but hard to see in pictures.

The sleeves were VERY long and I think I cut off 4 inches of length. If you know nothing about sewing and pattern sizing my measurements on this pattern give the image of an inverted triangle with T-rex arms. 

IMG_4222

Despite the potato sackish shape I really, really love this dress and have already gotten a lot of wear out of it. All I have to do is pick either brown or black tights and a pair earrings to go with it and…Boom! Outfit complete.

IMG_4223

Size 2 hips? That ain’t no size 2 booty!!! Thanks for making me feel skinny (ish) Sewaholic.


Summer sewing wrap up

I took a bit of a  hiatus from blogging this summer and it’s time that I posed an update. I made several garments (dresses, skirts, a tank top and a romper) and will highlight the ones that I have photos of.

IMG_3535

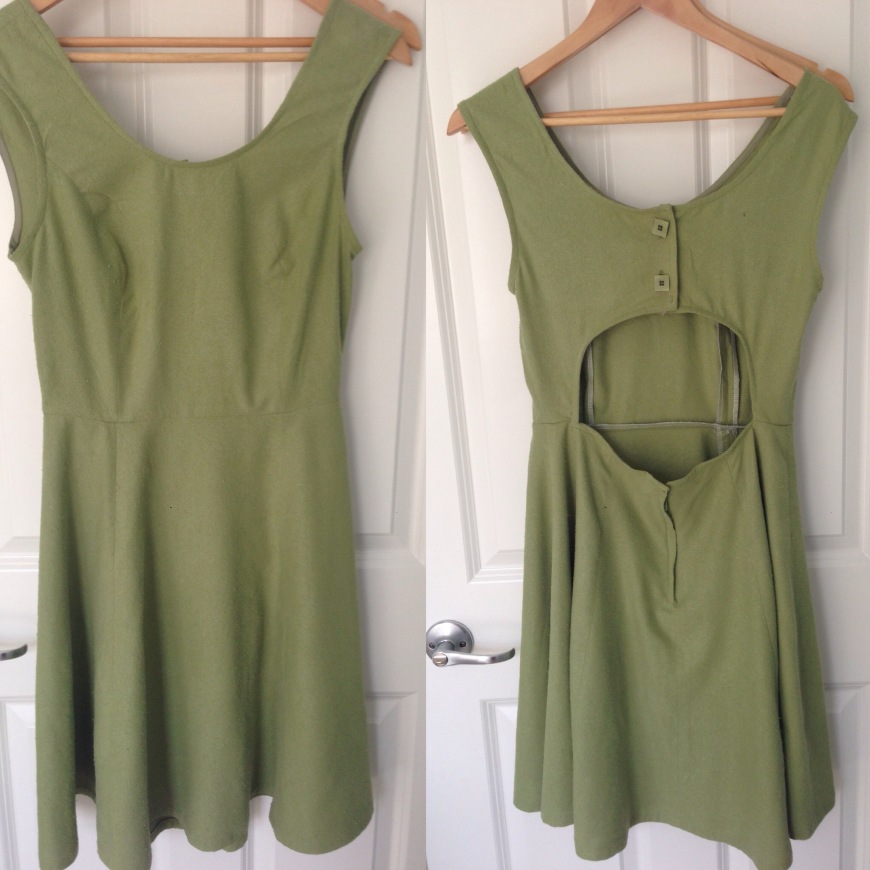
I revisited McCalls 6887, it’s actually a really great pattern. I had a lot of fitting adjustments to make in the first muslin, but I have now really warmed up to it. So in the summer I made 2 of the backless versions. The first is in a green raw silk which makes we want to drape myself in silk. All the time. I didn’t line it and used bias binding to finish the necks, arms and back. The bottom of the back gapes a bit but I fixed it in the next version. Those perfectly matched buttons are vintage from Button Button (they sell buttons). And my first button holes ever, yes, I lost my button hole virginity on this dress. (Make sure you articulate that sentence in your head correctly !)

Green

Virginia and I on a patio in Yaletown, the night I convinced her to move back to Vancouver.

The second is the same, but in a cotton. I made a small adjustment to the back of dress where there was gaping in the first version. Other than that it’s almost straight out of the package! These dresses are very comfy, and I am loving this pattern the more i think about the dresses.

Sallie

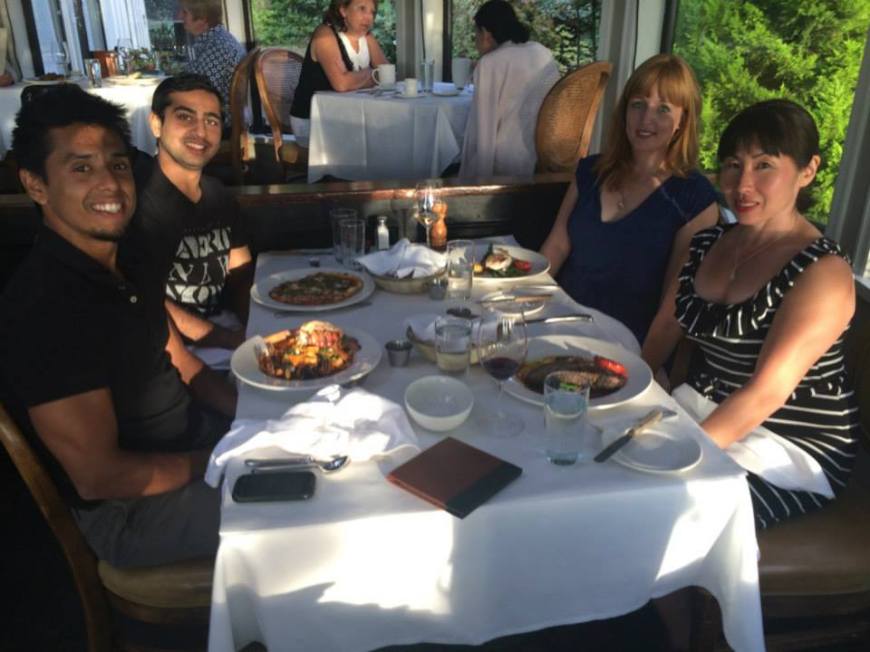
Wearing my Sallie romper at the Teahouse in Vancouver with friends

I made a Sallie Romper from Closetcasefiles following her tutorial on how to make the jumpsuit into a romper. This thing is seriously comfortable! I used a bamboo knit which adds to the comfort. I was slow to accept jumpsuit trend but now I am on board. My jumpsuit is also my first garment with leg holes.

Simplicity 1873

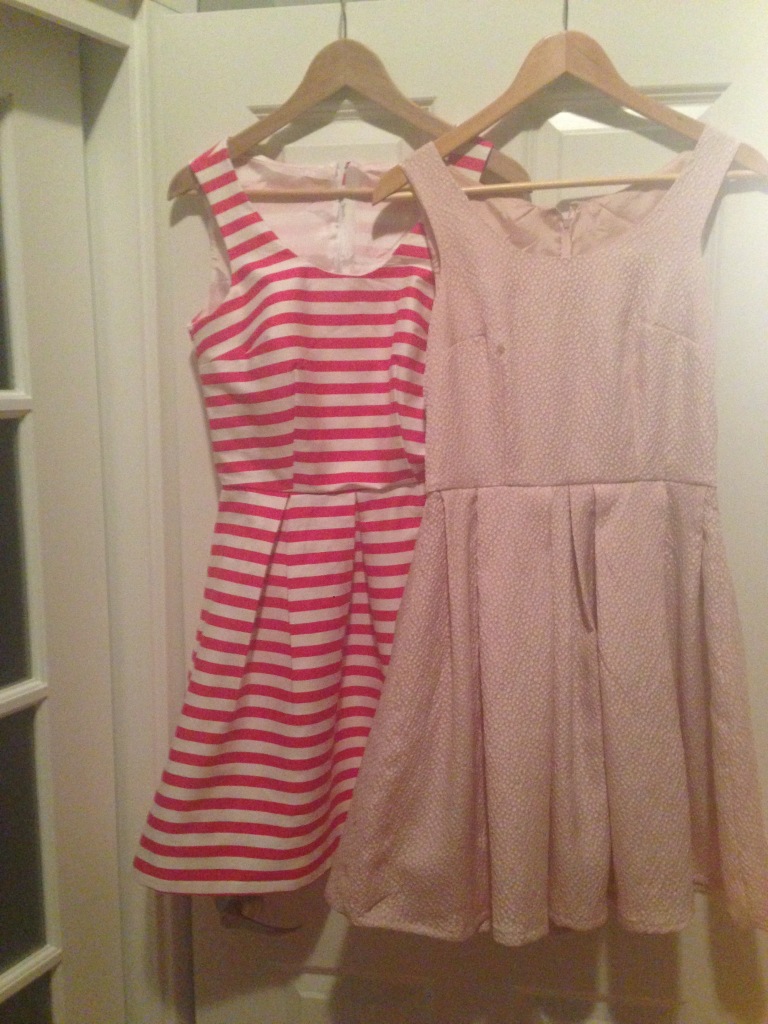
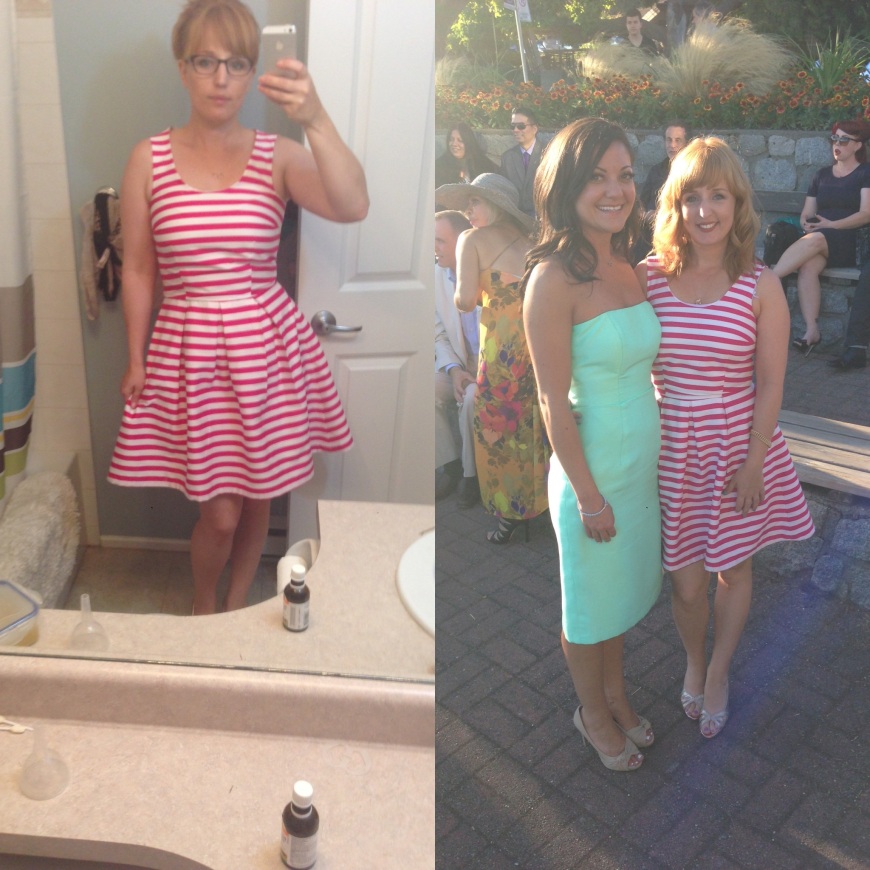
Simplicity 1873 – striped version with Thai dress skirt

I had two weddings to attend this summer and I finally got my hands on Simplicity 1873 when I was in California this winter. I am still pissed Simplicity pulled out of the Canadian market especially because I had almost no adjustments to this dress. I did make a wearable muslin in navy blue viscose poplin which has a less fitted look to it due to the fabric relaxing.

The second version I made was for my long time friend Arabella’s wedding for which I was a bridesmaid. Not a lot of adjustments – an FBA, a tuck at the neckline, and letting out the seams by a smidgeon for more comfort for an August wedding.  I could have gone up a size in the bodice but I thought Simplicity was going to pull a large ease surprise on me like McCalls, but the sizing was spot on.This dress is a blush pink jacquard poly crepe, lined in bemberg and I did a really nice job on the garment (very proud of myself) ! It’s does look over fitted to me in pictures, but you will see in the striped version how different fabric choices make bite differences in the fit.

View More: http://photos.pass.us/paulandarabella

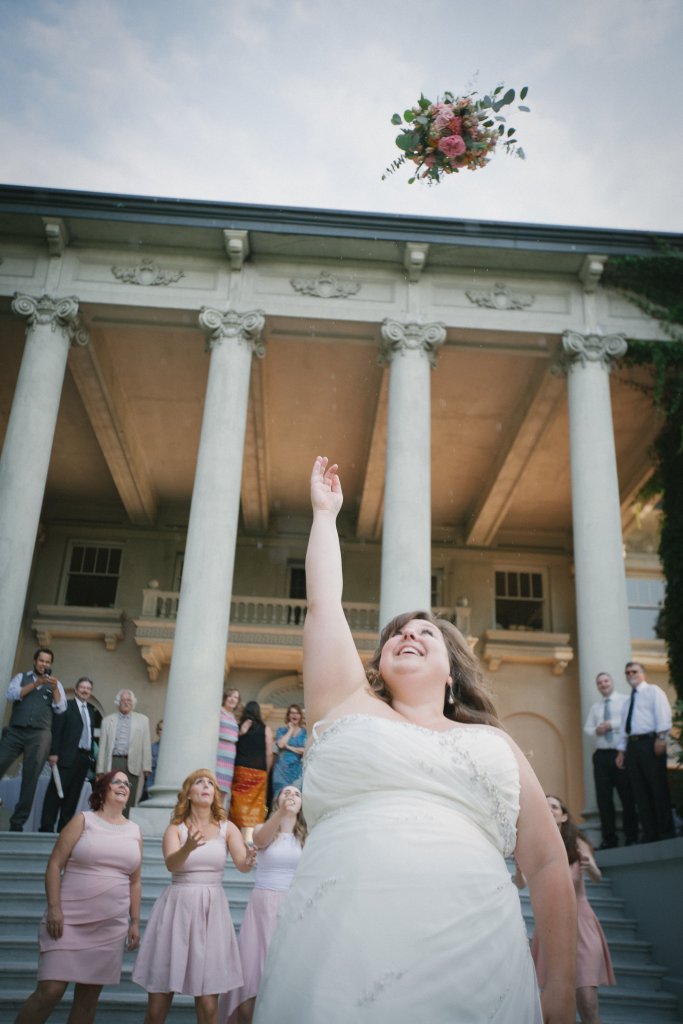
No, I did not catch the bouquet!

For my friend Kelly’s wedding I used the same bodice with the large simple pleated skirt from Thai dress pattern. Fully lined, same adjustments as the blush version but more ease from the fabric choice. The stretch cotton sateen made for a roomier dress and gave a nice solid structure to the flared shape of the skirt and crisp pleats. .Such a great pattern, I hope I can wear these dresses out again.

Another weddingDespite my hatred for PDF patterns I have been subscribing to Seamworks magazine. I made a cherry chambray Adelaide dress fits very well. Being a picky seamstress I will make a small FBA and a small adjustment on the straps next time. I picked up the fabric from Joann’s when I was in California earlier this year, along with another cherry print, both are from Gertie’s collection.
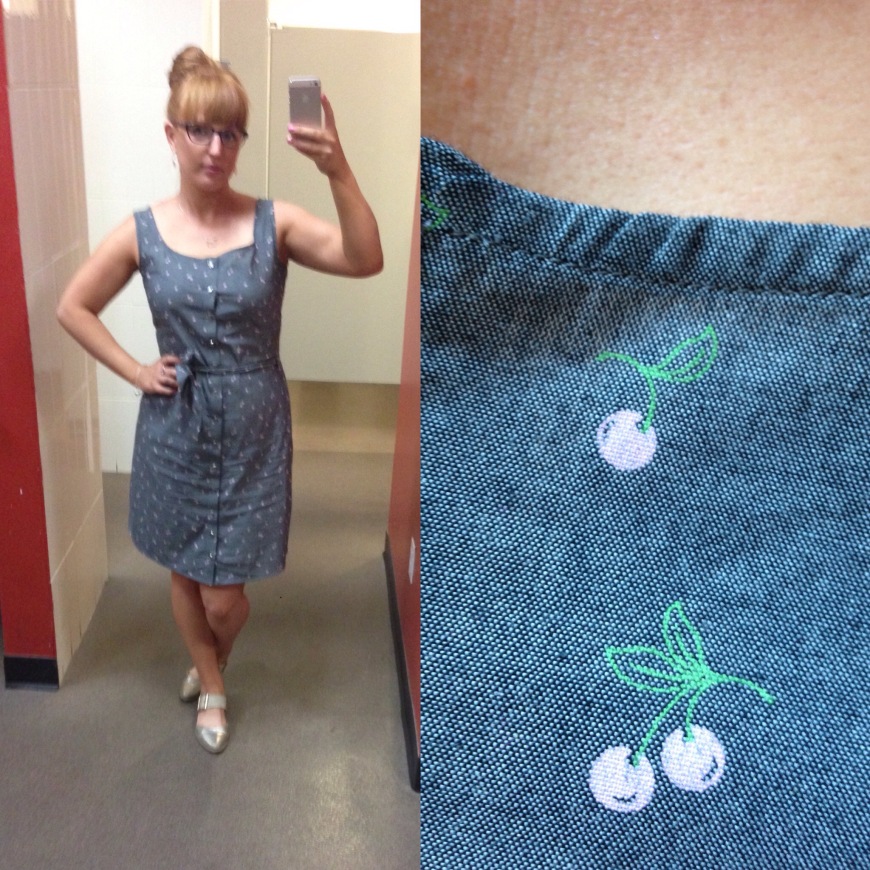
Seamworks Adelaide

Seamworks Adelaide

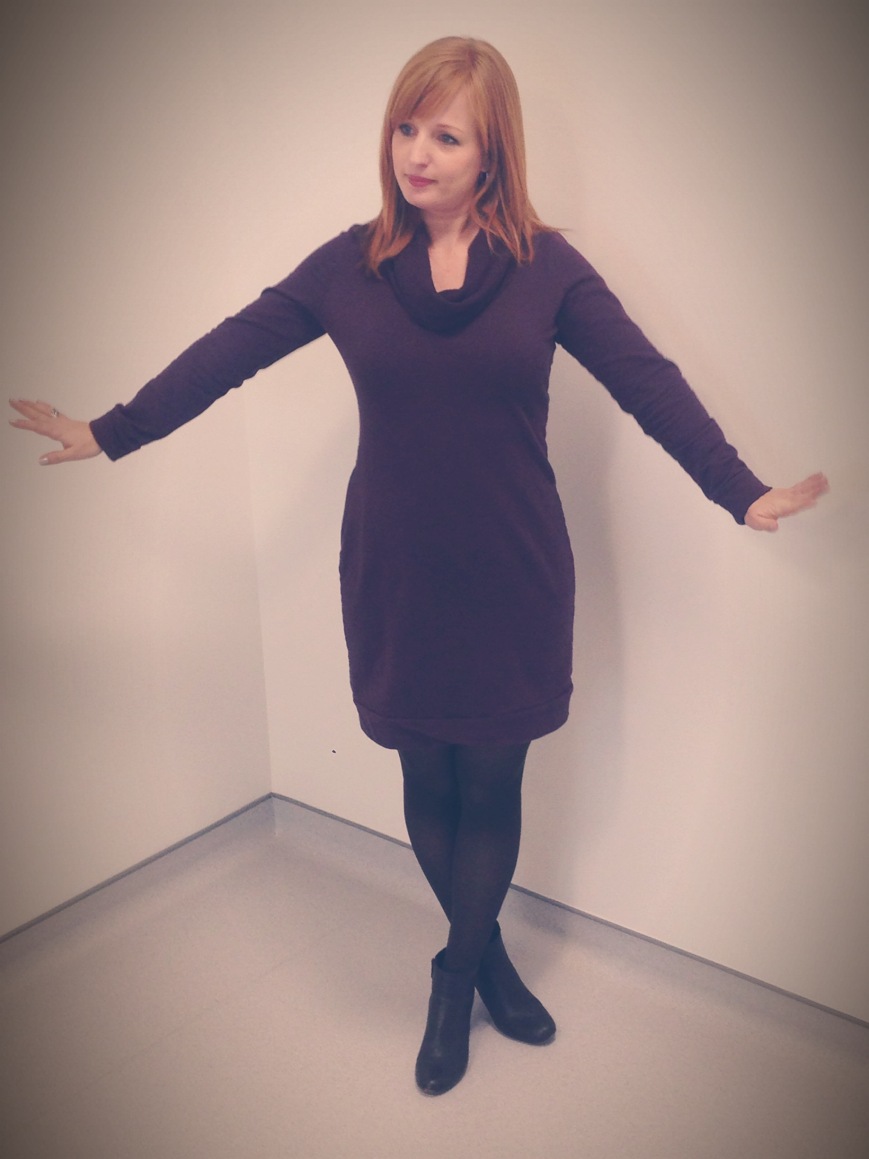
This was a long and hot summer in Vancouver. I saw many bloggists posting linen trapeze dresses that are breezy, and great in the heat. They are interesting dresses. They are not unflattering which is odd since they are essentially extreme a-line tents and I did feel like I was wearing a maternity dress. However, in the heat the linen viscose was an absolute dream. The photograph is not the best, but you get the idea. With a big statement necklace and wedges it is a cute look and an great alternative to my usual fit and flare style. I used a Burda pattern for it using bias binding instead of facings. I ended up taking out about 2 inches from the sides from under the bust dart that I also added. Immediately after I made this dress I made a tank top version from this pattern, same fabric.

Burda trapeze dress

Burda trapeze dress

There are other garments that I made this summer, but these are the ones I have photographs for. I have many plans for fall sewing but I just need to get my sewjo back again.

Tai Dress, take two!

Ok here is the second version of this great pattern! I made the two versions back to back and I get so much wear out of both of the them.FullSizeRender[9]

Let’s talk about the elephant in the room here. My photography is horrid I know. I have been playing around with timer apps on my phone and this is as good as it gets apparently. The latest app has weird zooms in really close on one part of my body (this pic happens to my boobs) and slightly from an under angle (zero flattery). It also refuses to include my legs, not matter how far away or close I am. I should invest in a remote for my actual camera, but that’s money I could be spending on fabric, right? If anyone has a suggestion for a decent timer app I would appreciate it.

IMG_3428


Let’s focus on the dress.

This time I used tencel denim. I LOVE this fabric. Drapey, soft, sews well, serges well. I did the same princess seam alteration as the last dress but this time I also took in those seams by 1/2 inch under the bust and used a 5/8 seam allowance for the side seams instead of the 1/2 SA the pattern calls for. With this fabric, hindsight tells me I should have done an FBA. It’s not pulling anywhere over my bust, but I think there is a hint on uni-boob depending on the bra that I wear with this dress.

I used the lining pieces with bemberg of course so I will be able to wear this dress with tights in the transition seasons. How great is it to have separate lining pieces??

The dress is a tad on the short side for work (no being anywhere close to my 20’s), but perfect for out and about. I am really pleased with it.

IMG_3431


As I said in my previous post with my first Tai version, this is a great pattern. The only downside I can see to this pattern is that there is no sleeve option, but that’s what sweaters are for, right?


FullSizeRender[9] copy


Take home messages are:

1. Buy this pattern

2. Buy tencel denim, it’s wonderful

3. I am too cheap to invest in a proper camera, so enjoy the odd unflattering photography

Tai Dress

I recently made the Tai Dress from Skinny Bitch Curvy Chick patterns. I was introduced to this pattern by Kathy from theNerdySeamstress. Her version is adorable, and this is really a great pattern. The dress is a princess seam bodice with back darts and a pleated skirt.  It uses little fabric and can be made with many different types of fabric. This dress can be worn as a work dress with flats and a cardigan or jacked, or heels/wedges for a night out.  Plus, I really enjoyed sewing it. IMG_3412

I was unsure whether I would need to do an FBA, and after reading Kathy’s review and emailing with Betsy, the company owner, I decided not to for the first try. I think with a heavier weight fabric with no stretch a small FBA (1/4 inch) would be ideal. I cut the size small and made it out of a stretch cotton in a light and spring-ish print. The alterations I made were: taking in the princess seam close to the armhole and took in the side seams by about an inch from the bust down to the waist seam. I also did a hand ticked lapped zipper instead of the recommended zip. The neck gapes a bit which I took care of with the next version.

IMG_3404[1]

I opted not to line the skirt, but this pattern comes with separate lining pieces! I am going to use the lining in many other skirts and dresses, it is so useful. The pattern finishes the neckline and armholes with bias binding which is surprisingly new to me. I love the finish, so much so that I used bias binding on the hem.

IMG_3409

I am very impressed with this pattern company and surprised other bloggers have not tried this pattern. Everyone should!

McCalls 6887….times two!


FullSizeRender[9] IMG_3133[1]

It feels like forever since I have posted about my sewing. I did make a few items over the past few months including a couple of knit shirts (Plantain, Nettie, and Lady Skater peplum) and my first Burda pattern (a so-so skirt). They were all in black and grey and not super exciting.

I have seen McCalls 6887 made by a handful of bloggers who have said this pattern has been fitting just out of the package. Sadly, this was not the case for me. It’s a versatile fully lined pattern with front and back princess seams, one option has a cute cut out in the back and there is a full and straight skirt option. And this pattern comes with separate bust cup sized pieces!! My intention was to make this dress in the sleeveless and full skirted options for a wedding that I am in this summer. Glad I made this dress twice before I made the bridesmaid dress – after 2 muslins and 2 dresses I still do not have the fit perfected.

IMG_3132[1]

Based on the finished measurements I started with the six 12 C cup, and it was HUGE everywhere. So I sized down to the size 10 and still had a lot to take out. The back was still billowing out so I took a wedge 1.5 inches wide and 12 inches long (!!) out of the centre back panels. I had originally made a wide waist adjustment that would allow for an extra inch total of ease in the waist (again based on the pattern’s finished measurements) and this was definitely not needed. I took this out in the finished dresses just in case the fabrics needed more room.

IMG_3135[1]

The first dress I made is out of a cotton with 3% spandex, self lined the bodice and used bemberg rayon for to line the skirt. I have to be honest I am not very happy with the fit of this dress. There is gaping at the neck, the back of the bodice is too long, the upper back of the skirt has some weird excess fabric lines, and the hips are a bit exaggerated. Also, it’s just too big overall and is not the most flattering dress. It’s in the dryer right now, hopefully shrinking a bit. The dress is just ok, and I will keep it to wear for work.

IMG_3099

The second version is better but I didn’t do anything about the extra length in the back bodice. It was really out of laziness – I was so annoyed with all of the adjustments I had to make, and I would have to alter the two back pattern pieces. I regret it now because it’s now bothering me! I did take a wedge out of the neck for this version to take care of the gaping neck. I also took in 2 inches of ease from the side seams in the bodice. After taking the pictures it’s also apparent that the bodice is in general just too long, an inch off the overall length would likely make a difference.

FullSizeRender[4] IMG_3113[2]

The bodice is self lined in the front, and bemberg in the back and decided against lining the skirt. The fabric is my new favourite – rayon poplin. Rayon and tencel are so drapey and they sew and serge beautifully. Both dresses have lapped zippers instead of invisible zippers, with hand ticking which looks way better that any zipper I have sewn in. And as I hate the flimsiness of invisible zips this will likely be my go-to method. I learned the hard way it is near impossible to machine stitch the lapped part, but really hand ticking can be done in front of the TV.

.FullSizeRender[6]

I will not be using this pattern for my bridesmaid dress, so I better start testing other patterns!! Although I am not very happy with the fit of both dresses my finishing skills are improving which makes me happy. I am very proud of my new zipper skills. I think I also need to think harder about the patterns that I am purchasing. It’s very tempting to buy patterns from the big 4 since they have so many new ones every season. My body seams to have better lucky with Indie patterns, and I might have to stick with them even though they are more expensive. I do have another McCall’s dress in a knit on the list of sewing to do’s, so fingers crossed the fitting is better.

See Kat Cook!

This dish was a winner at my book club. Do you like the rogue battery in the corner??

This dish was a winner at my book club. Do you like the rogue battery in the corner??

My new work pal Emily recently published her first cook book, Well Fed, Flat Broke  and very kindly gave a copy to me. After making a few recipes and being extremely happy with them I thought I should tell everyone about the yummy recipes I have been making.

Chana Masala

The book is about eating deliciously while on a tight budget. I have to say I was very impressed as soon as I started trying the recipes. I felt Emily’s love of food right away when I started trying her meatless recipes – if a meat eater can make lentil tacos more desirable than beef tacos, she LOVES all food. I am not a vegetarian but those meatless meals were delicious and will all be made again, some already have.

This week I decided to plan my dinners and left over lunches based on a common ingredient. Since I have been so virtuous with lentil tacos, chana masala, roasted aloo ghobi, and lentil sloppy joes, I thought that bacon was a good choice. I started with the leek and bacon barlotto (risotto made with barley) and then pasta shells with bacon, chickpeas and brussels sprouts.

Bacon bacon bacon!

Obviously the dish with bacon starch and wine was a winner, how could it not be? But the pasta was really excellent. The salty bacon with chickpeas and pasta was surprisingly a fantastic combination, layered with a kick from the chillies and the freshness of lemon juice  and zest. The bonus here – I realized I really like brussels sprouts! Cooked with bacon of course……

IMG_2994

Lentil tacos – to die for!

Anyway, if you are looking for new recipes that are based on Vancouver fusion cuisine that is easy on your wallet, I recommend Emily’s book, and you can buy it here on Amazon for pre-order for the April release.

Lentil sloppy joes

Again, Coppelia! My merino jersey version

I said I was going to make it in merino wool and here it is! My second Coppelia from Papercut Patterns. As I said in my last post this is an easy pattern! I used my serger for everything but the final bit of attaching the band at the end.

IMG_2615

This amazing fabric is merino jersey, bought almost a year ago at the Fabric Store in L.A. It’s grey with turquoise dots, and I love it! Look at it! It’s freaking beautiful! It wasn’t cheap, but who cares? It’s great quality, cozy and gorgeous. I felt so guilty and sad looking at the pile of fabric noodles my serger left behind because I hated the idea of wasting it. I love how “sweatery” this version turned out.

IMG_2588

I made slight changes to this pattern from last time because after washing it I only had 1.4 metres of fabric, and the pattern needs 1.6 meters for the unaltered pattern. I don’t know how long it took me and how many different ways of laying out the pattern pieces before I finally figured out how to make it work with that amount of fabric, but I did it! Due to the fabric constraints I could only lengthen the bodice by 2 inches instead of the 3 inches in the previous version, and I had to cut the band into 2 pieces instead of three using the entire width of the fabric. This fortunately gave a couple of extra inches to make up for the band sitting below my waist closer to my hips.

FullSizeRender[1]

I can tie it around my waist but I prefer how it looks and feels when I wear it tied in the back.

IMG_2591

Yikes! Looks like I had a few drinks before topstitching the waistband to the bodice.


Good news: my topstitching with knits is getting better. Bad news: top stitching with the knits is still pretty terrible. I am not sure what foot I should be using for top stitching knits. I used my walking foot for both Coppelia tops, but I am now wondering if I should have been using my edge stitching foot.

I didn’t realize the needle tension on my serger should have been a bit tighter until after I had attached the neck band on. I used light grey serging thread which you can see through the front if you pull at the seams. If for some reason I start pulling my seams like a crazy person then I will go over and machine stitch with a thread in a better matched colour. Live and learn right?

My Coppelia wrap

IMG_2557

Look at me, finally making a top to wear!! I even have a new menu item on my blog. Here is my first version of the Coppelia Cardigan from Papercut Patterns. Oh yes, I will be making more.

I have had the Coppelia cardi pattern for a while now and finally made a wearable muslin. I have some precious and gorgeous merino jersey that I bought specifically for this pattern when I was in L.A. last year. I definitely had to make a test version before cutting into that stuff!

IMG_2563

For this version I used a yummy bamboo rayon knit. What I mean by yummy is that it is soft, drapey, and  just has the perfect feel to it.  Just dreamy! I went with a charcoal for this one because I need more basics in my handmade wardrobe.

IMG_2564[1]

The ease is easier to see in this pic – you can also see how much room there still is under the arm.

This pattern was very easy to make, and 90% of it was sewn on my serger. I made the XS but could have made one size smaller. Based on other bloggers advice who had lengthened this pattern to wear with jeans I lengthened the front and back pieces by 3 inches and trued up the seams. I also lengthened the neck band by 3 inches, but should have measured that more carefully. I had to stretch is out a bit as I sewed to make it meet the ends properly. Unfortunately I forgot about lengthening the tie band. This pattern was made to wrap around the waist, so moving it down to the my hip height means that I should have increased the overall length by at least 10 inches. So, this will one will remain tied in the back which I am fine with.

FullSizeRender

The other changes I made to this pattern was to take in the side seams starting from the wrist at .5 and inch and increasing to 1 inch at the armpit, then into nothing at the bodice base. I could have taken the seams in more but I wanted a looser fit. It’s hard to tell from these photos that is is not skin tight but there is a lot of ease.

If you are unsure about this pattern, just order it and make it! The pattern came together so smoothly and was a joy to sew.

My top stitching on the tie band is embarrassingly terrible – just have to practice more!


McCalls 6842

Yes, they are back! The mediocre locker room picks. I know, everyone has been waiting for them right? Oh and I included some wrinkles too to make it extra special!

mccalls

That’s right, there is a toilet stall behind me!

Ok, let’s ignore the photography and look at the skirt that I made, McCalls 6842. I made view C, which has a wide yolk-like top with a semi-circle attached at it’s base. It’s a cute flirty design with lots of movement. As it is a semi circle skirt, you have to be careful in the wind if the fabric is not heavy enough.

So..the fit of the skirt…….Oh the Big 4, your sizing is the pits…. there is no real description where this skirt is supposed to sit. It would be nice if they gave a ballpark, like X many inches under your navel. Nope, just a finished hip measurement that really is not the best measurement for me to go by. Why you ask? Because my largest hip width is deep in the trunk – my sides are not ‘hippy’ if that makes sense. My hip width protrudes from the butt not all the way around, like I said my junk is kept in the trunk!  For sewing I go by the measurement a few inches below my hip bone which is 37, and my jumbo bum measurement at it’s max capacity is 38 but using that as my hip measurement does not work at all. Way too big at the sides usually.

IMG_2413[1]

I love the print of the fabric

So I based the sizing on the finished measurement of the size 12, thinking that should do it. It’s not supposed to be skin tight, so that gives about 3.5 inches of ease. Too bad the waistline location is a mystery that I still haven’t solved. When it was time to try on the skirt before attaching the facings it could have falling to the floor if I had sucked my tummy in. I took the waistline in by 2 inches, tapering down to the original seam allowance 5.5 inches from the waistline. It’s still a bit big, and definitely sits too far below my waist for my liking. Maybe if I make it again I will make it with a waistband instead.

As you can see from the photo below it sits lower that I am used to. There is some stretch in the fabric as well that makes it loosen up in the day. Also, you can see the facing through the outside. If there is another one of these skirts in my future I might line the yolk.

IMG_2440[1]

My tights are just covering my belly button, and the skirt is sitting at least 2 inches below. Not my ideal skirt height.

This skirt was an easy sew. Fast, simple, no hiccups. The instructions even have detailed zipper instructions (what?!) that actually make sense. This is a great beginner pattern. The easiness of this pattern was a serious bonus for me.

The fabric is a cotton print with about 3% spandex. I love this print, I have been looking for an animal print fabric for a skirt of this style for a while – they are harder to find that one would think. I think the skirt is cute but I am not sure what to wear with it other than sweaters. That’s ok because I have lots of them, some might say too many.  I was thinking that I would make one of these in black wool in the view B option, but I am not so sure. I am on a bit of a skirt kick, and I keep wanting to make another Chardon, but really how many Chardons can a girl have?

Flora for a wedding and my polyester debate

florap1

My friend and former coworker Erica got married over the past weekend in Seattle so I of course had to make a dress for this occasion. The BHL Flora dress seemed like a natural selection for the out-of-country event. The wedding was as perfect as they come, I am so happy she invited me to her special day.  Erica is a “former” coworker because she married an American man and sadly (for me!) relocated to the US. Here is a pic of her, she looks stunning! Her dress is gorgeous.

Erica

The lovely Erica on her big day. Have you seen a more beautiful bride?! Erica’s hubby is a lucky man.

Ok back to my dress! I love By Hand London patterns, even though I have only made 2 of their patterns so far. Their dresses are so pretty and the patterns are so easy to sew up. They look like a lot of work with little effort.

Florap2

For this version, I made the faux wrap bodice again with the same FBA adjustment as last time (1/2 inch or 1 full inch) and I kept the lowered bust dart. This time however I re-drew the dart to it’s original length as I had shortened it last time – it’s now a perfect fit. I was going to use an invisible zipper, but I could not get a perfect colour match so I went with the regular one. The closest colour in the invisible zipper selection was a grape colour which I hated. The back looks like I could have shortened the bodice by half an inch. Oh well, people should be checking out the front of this dress!


florap5

I also sewed the skirt this time, and l wow it’s a pretty effect. I did the high-low hem option and I love it. I think a straight hem version just as a skirt would be really nice. The pleating details on the front and back are amazing, it’s just not easy finding fabric that is 60 inches wide, most seams to hit the 59 inch mark which is actually too narrow.

florap4

I used a deep plum coloured polyester crepe with a touch of spandex which has beautiful drape. The stretch from the spandex is perfect for a party dress – lots of room for eating, drinking and dancing. I have had issues with using polyester in the past as I wanted my handmade wardrobe to be made out of natural fibers only. I have been avoiding synthetics like the plague but now I am thinking otherwise. The drape is beautiful, the price is right, and it was wide enough for the skirt. Plus it was a joy to sew. I am a convert and I am not ashamed to admit it!

I do have to make a non-dress related comment here. The curls in my hair are from a styling wand – I woke up the next day with curls which never happens. They held all night long which is a first for me – my hair is thick and very straight. If you have been on the fence about trying one – DO IT! The one I used was made by Conair and was only about $30.

florap7

View of the hem in the back right before I finished the dress. You can see here the beck is gaping a bit.